I'm putting a single recessed light at the bottom of the stairs and I plan to re-use the 3-way switch at the top of the stairs so I don't have to pull new wire. I pulled out the insulation below the wire drop to see where the wires went, and was quite disturbed to find burned insulation paper.

There is only one original circuit in the basement, and I haven't touched it yet as my new fixtures are on new circuits from the panel.

Looking up into the space, there is matching residue on the wire insulation, but it's strange that it doesn't appear melted at all. We've been in the house for 2 years and never smelled anything, or had issues with this circuit.
My only assumption is that during the original wiring, they mis-connected one of the three-way leads and tried to operate the circuit. This theoretically should result in a dead short, so I'm suprised that the breaker stayed on long enough to result in this kind of artifact.
For now, I think I'm going to look at other parts of this circuit and see if there are any additional examples of this kind of problem. If not, I may pull this section of wire out and replace it, just to err on the side of caution. I wonder what the individual conductor insulation looks like inside??
 I pretty much gutted all the basement wiring that existed and ran new wiring for the existing basement circuit. I installed 4 lights in the unfinished space where there was only 1. This made a huge difference and will help a lot when it's closed off. These lights are also on a 3 way switch at the bilco door and at the door into the finished space.
 Wiring for the play side was fairly straight forward. The 2 recessed lights in the soffit are included in a switched circuit with 2 outlets. I plan to install drop ceiling on the side with the outlets so I figured it would be easiest to terminate the recessed fixtures with a plug so I could remove them easily if I had to.
 I finished around the pole with 2x3's. I used the concrete nails to fix the treated base in place. I wanted to have space for an outlet and leave the front of the finish feature flush with the soffit side above to eliminate any steps in the drywall. I made it 7-1/4 square. I put this outlet in after the fact, so I had to pull back some wiring to include this in the circuit, but that was easy. I think I'll go back and put some support blocks in to keep the 2x3's stiff enough. I don't want to have the drywall cracking every time someone bumps it.


 The long side wall went quickly as well. The only hiccup here was framing around the panel, which turns out is hung crooked on the wall. I'll remove the service outlet later on and put a stud on the right side to tie in the drywall.
 Here's a shot of the playroom side of the basement. You can also see the finished soffit drop on the beam side here.


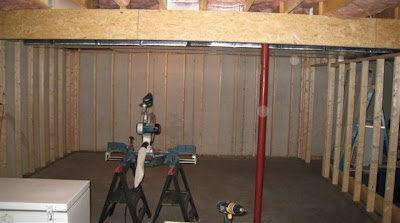
 Here, you can see the area that I will have to soffit around. The plan is to hang a panel on the right side of the duct run similar to the one I ran down the side of the beam. I'll run 2x4 stringers between the panels, tipped on their side to keep the ceiling height maximized. I'll also run supports up to the joists between the duct and the beam periodically to keep the 2x4's from sagging over time with the weight of the drywall. I'll probably run the stringers every 24" and space them to align with the light locations.