 I more or less completed the framing effort this past weekend. The only thing that's left is to tie in the soffit under the ducting, and frame around the post.

The partition wall was a little more complex because I had a shorter section to run under the duct, then back to standard height for the remainder of the wall.
I centered the door in this section, leaving about 25" between the door frame and the back foundation wall. This will be perfect for 24" shelving in the unfinished space.
 The long side wall went quickly as well. The only hiccup here was framing around the panel, which turns out is hung crooked on the wall. I'll remove the service outlet later on and put a stud on the right side to tie in the drywall.
 Here's a shot of the playroom side of the basement. You can also see the finished soffit drop on the beam side here.


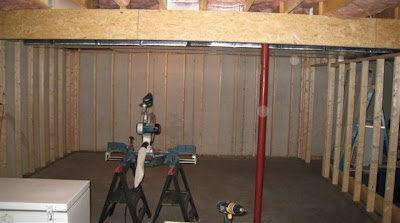
 Here, you can see the area that I will have to soffit around. The plan is to hang a panel on the right side of the duct run similar to the one I ran down the side of the beam. I'll run 2x4 stringers between the panels, tipped on their side to keep the ceiling height maximized. I'll also run supports up to the joists between the duct and the beam periodically to keep the 2x4's from sagging over time with the weight of the drywall. I'll probably run the stringers every 24" and space them to align with the light locations.